
Mastering Your Water Dispenser: Tips and Tricks
Mastering Your Water Dispenser for Pure Refreshment
That gleaming appliance in your kitchen, the one promising instant cool and hot water at the touch of a button – your water dispenser. It’s a modern convenience we often take for granted, but like any appliance, a little understanding can go a long way in ensuring it’s always delivering crisp, clean, and safe hydration.
Forget just stabbing at the levers and hoping for the best! Mastering your water dispenser is about optimizing its performance, maintaining its hygiene, and even making the most of its features. So, let's dive into some essential tips and tricks to elevate your water dispensing game.
1. The Foundation: Proper Bottle Handling is Key
This might sound obvious, but the way you handle your water bottles is crucial for both hygiene and preventing spills.
- Clean Hands, Clean Bottle: Always wash your hands thoroughly before handling a new water bottle.
- The Gentle Removal: Don't yank the old bottle. Unscrew or lift it out smoothly. If it’s a sealed bottle, ensure the seal is fully removed before inserting.
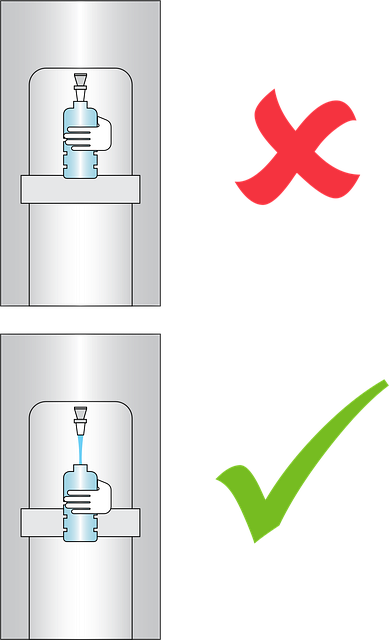
- The Secure Insertion: For new bottles, make sure it’s firmly seated before you start dispensing. This prevents air leaks or gurgling sounds.
- Keep Those Drip Trays Clean: Empty and wipe down the drip tray regularly. It’s a prime spot for water to stagnate and attract bacteria.
2. Beyond Hydration: Understanding Your Dispenser’s Features
Most dispensers offer more than just cold water. Let’s explore how to use them effectively:
- Hot Water Wisely: Your hot water feature is a game-changer for quick cups of tea, instant oatmeal, or even sanitizing baby bottles. Caution is paramount here! Always use the designated hot water tap with extreme care, especially around children. Many dispensers have child-lock mechanisms – use them!
- Cold Water Consistency: If you find your cold water isn't as cold as you’d like, check the thermostat (if your model has one) or ensure the dispenser has had enough time to cool a new bottle. Avoid dispensing large amounts of cold water immediately after inserting a new, room-temperature bottle.
- The "On" Switch: Some dispensers have separate power switches for the cooling and heating elements. If you're not using the hot water frequently, consider turning off the heating element to save energy.
3. The Unsung Hero: Cleaning for Purity and Taste
This is where many people fall short, and it's the most critical aspect of mastering your dispenser. A dirty dispenser can compromise the taste and safety of your water.
- Regular Cleaning Schedule: Aim to clean your dispenser thoroughly every 1-3 months, depending on usage and water quality in your area.
- Exterior Wipe Down: A simple wipe-down with a damp cloth and mild soap will keep the exterior looking pristine and hygienic.
- Spout and Tap Sanitization: These are the direct contact points. Use a soft brush and a diluted bleach solution (1 teaspoon bleach per quart of water) or a food-grade sanitizer. Rinse thoroughly afterwards.
- Interior Cleaning (The Big One): This involves cleaning the internal reservoir and tubing. Many manufacturers provide specific cleaning instructions and kits. Common methods include using:
- Vinegar Solution: Mix equal parts white vinegar and water and run a few cycles of hot and cold water through the dispenser.
- Baking Soda Paste: For stubborn residue, a paste of baking soda and water can be used for scrubbing internal parts, followed by thorough rinsing.
- Manufacturer-Specific Cleaners: These are often the safest and most effective option. Always follow the product instructions precisely.
- Don't Forget the Drip Tray and Bottle Seal: These are often overlooked but crucial areas for bacterial growth.
4. Troubleshooting Common Dispenser Woes
Even with the best care, you might encounter minor issues.
- Leaking: Check the bottle seating, the drip tray, and the spigots for any loose connections or cracks.
- No Water Dispensing: Ensure the bottle is properly seated, the power is on, and there’s no air lock. Try removing and re-inserting the bottle.
- Unpleasant Tastes or Odors: This is almost always a sign that your dispenser needs a good cleaning. Refer to the cleaning section above.
- Noisy Operation: Gurgling or unusual noises can indicate an air lock or a loose bottle.
5. Beyond the Basics: Pro-Tips for Extended Care
- Use High-Quality Water Bottles: Opt for reputable brands and ensure bottles are stored upright in a cool, dark place before use.
- Consider a Water Filter: If your tap water quality is a concern, using filtered water bottles can further enhance the taste and purity.
- Read Your Manual! Seriously, it’s there for a reason. Your dispenser’s manual will have specific cleaning instructions and troubleshooting tips tailored to your model.
- Know When to Call a Professional: If you’re experiencing persistent issues or are uncomfortable performing deeper cleaning, don’t hesitate to contact the manufacturer or a qualified appliance repair technician.
Mastering your water dispenser isn't about complex engineering; it's about mindful usage and regular, thorough cleaning. By incorporating these tips and tricks into your routine, you'll ensure your dispenser continues to be a reliable source of delicious, clean water for years to come. So, go forth and conquer that dispenser – your taste buds (and your health) will thank you!